Security
Secure data upload to openSenseMap
Information on connecting and programming the sensors, Bees and other components
The Wifi-Bee is the connecting piece to connect the senseBox to the Internet. The data from the senseBox is transferred to the existing network via WLAN (WiFi). The WiFi-Bee is based on the ATWINC1500 microchip from Atmel.

To test the Bees’ connection to the Internet, i.e. to check the function of both the component and the network, use the following sketch:
#include <SPI.h>
#include <WiFi101.h>
#include <senseBoxIO.h>

void setup()
{
    // Initializes the serial monitor
    Serial.begin(9600);

    // Launch WINC1500 (WiFi-Bee) in XBEE1 socket new
    senseBoxIO.powerXB1(false);
    delay(250);
    senseBoxIO.powerXB1(true);
}

void loop()
{
    delay(5000);
    // Displays installed and latest firmware version
    String fv = WiFi.firmwareVersion();
    Serial.print("Firmware installed: ");
    Serial.println(fv);
    Serial.print("Latest firmware: ");
    Serial.println(WIFI_FIRMWARE_LATEST_MODEL_B);

    // Outputs IP address of the senseBox
    IPAddress ip = WiFi.localIP();
    Serial.print("IP: ");
    Serial.println(ip);
    delay(5000);
}
If values are displayed in the serial monitor for all outputs, especially the IP address is displayed in the form 192.107.256.4, the WiFi-Bee is correctly initialized and the senseBox can be used with the Internet.
Sorry, some of our WiFi Bees of type WINC1500 have an outdated firmware (version 19.4.4) installed. Unfortunately there is no other way to update this firmware than to do it manually. The following chapter explains how to find out which firmware you are using and (if you have an outdated version) how to update it.
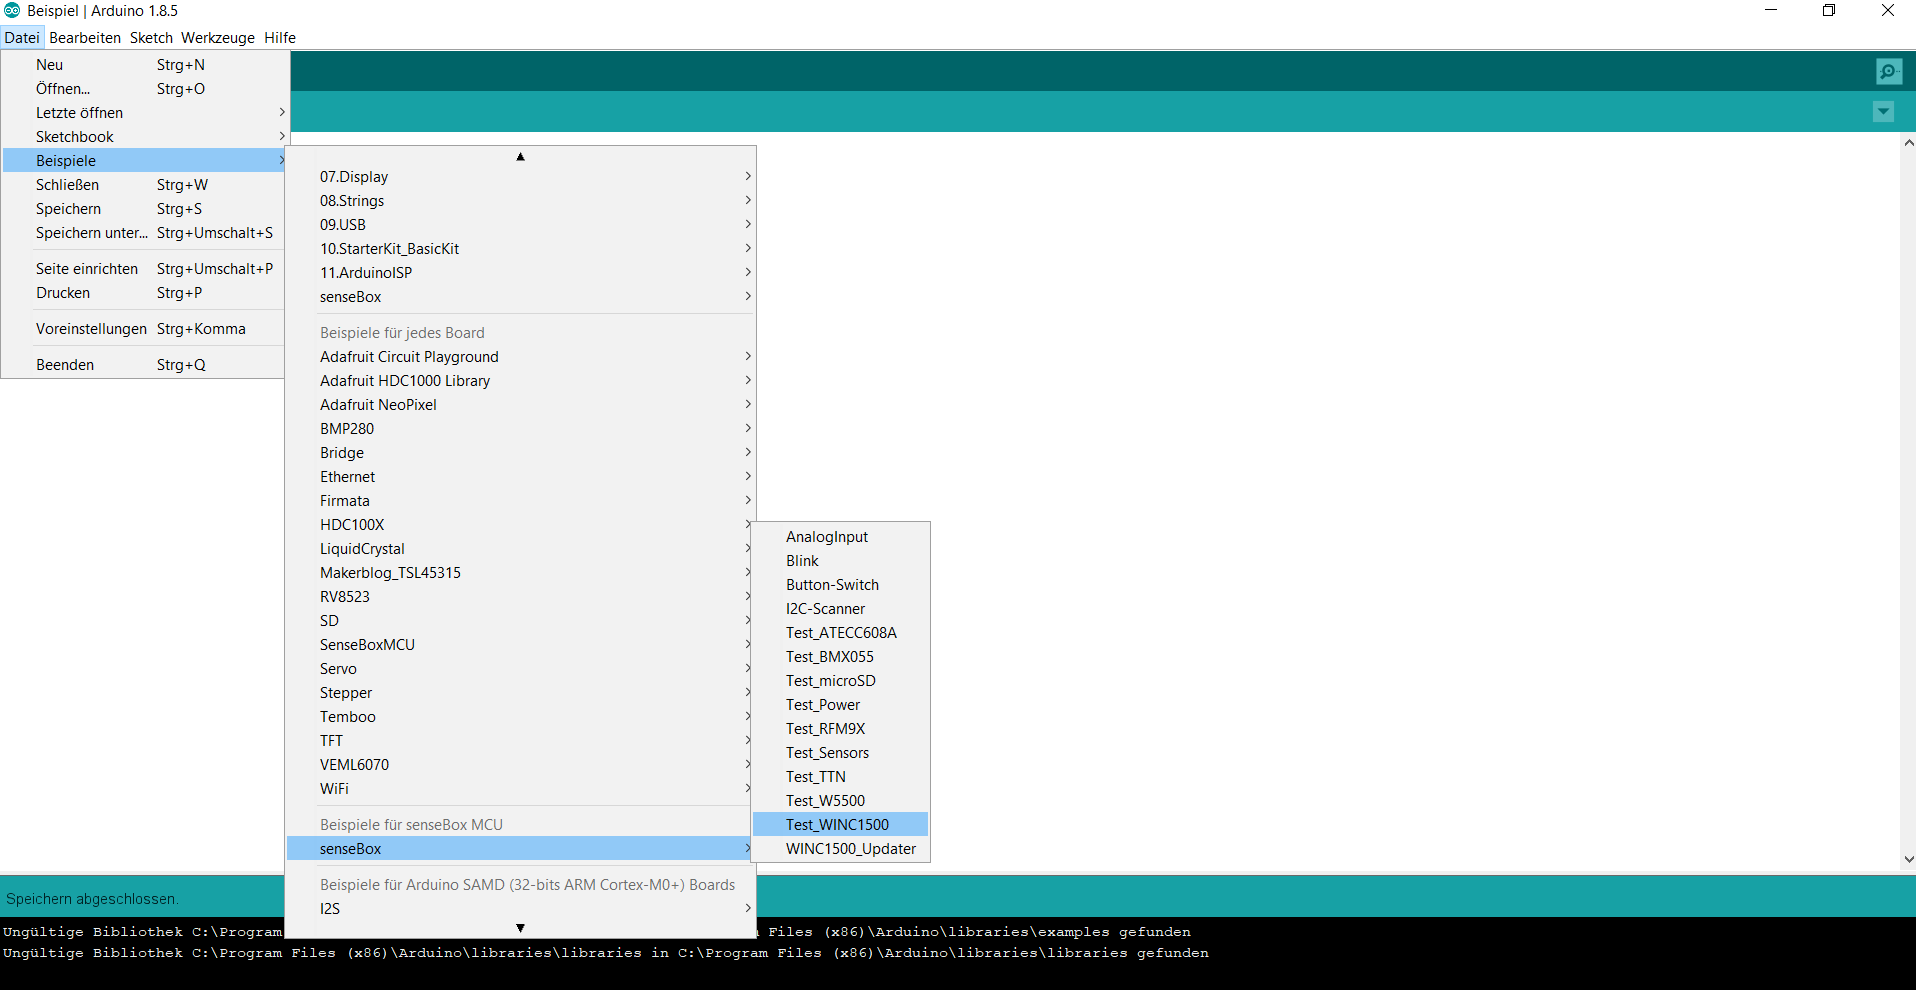
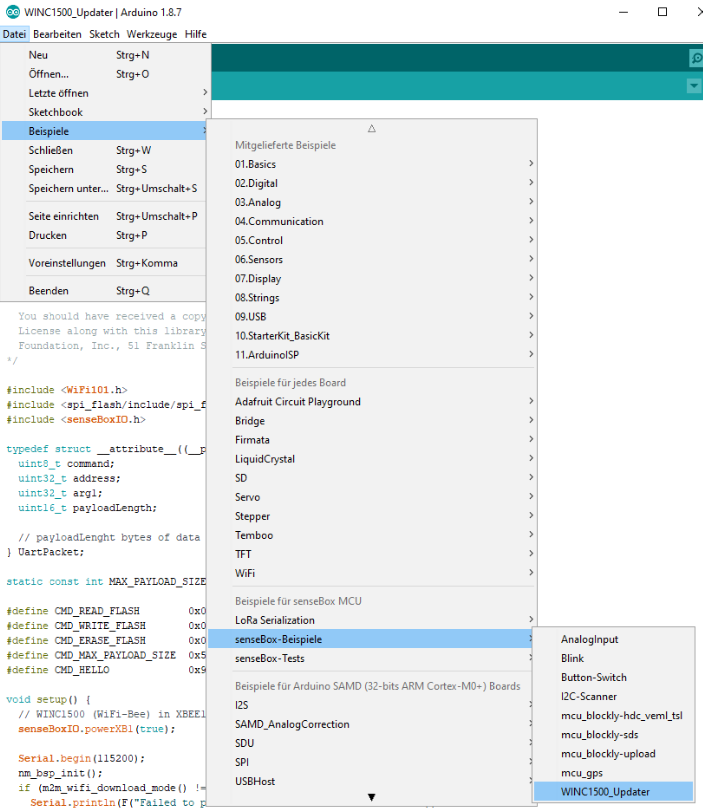
First you need to check which version your WiFi-Bee has. Go to ‘File’ -> ‘Examples’ in the Arduino IDE and under ‘Examples for senseBox MCU’ to ‘Test_WINC1500’.
Now load the sketch onto your board (by clicking the arrow symbol). Note that the WiFi-Bee must be plugged into your senseBox board (please plug it into XBEE1). Then click on the serial monitor (by clicking on the magnifying glass icon) and it will check if your Wifi-Bee is functional and show you which firmware is installed on it.
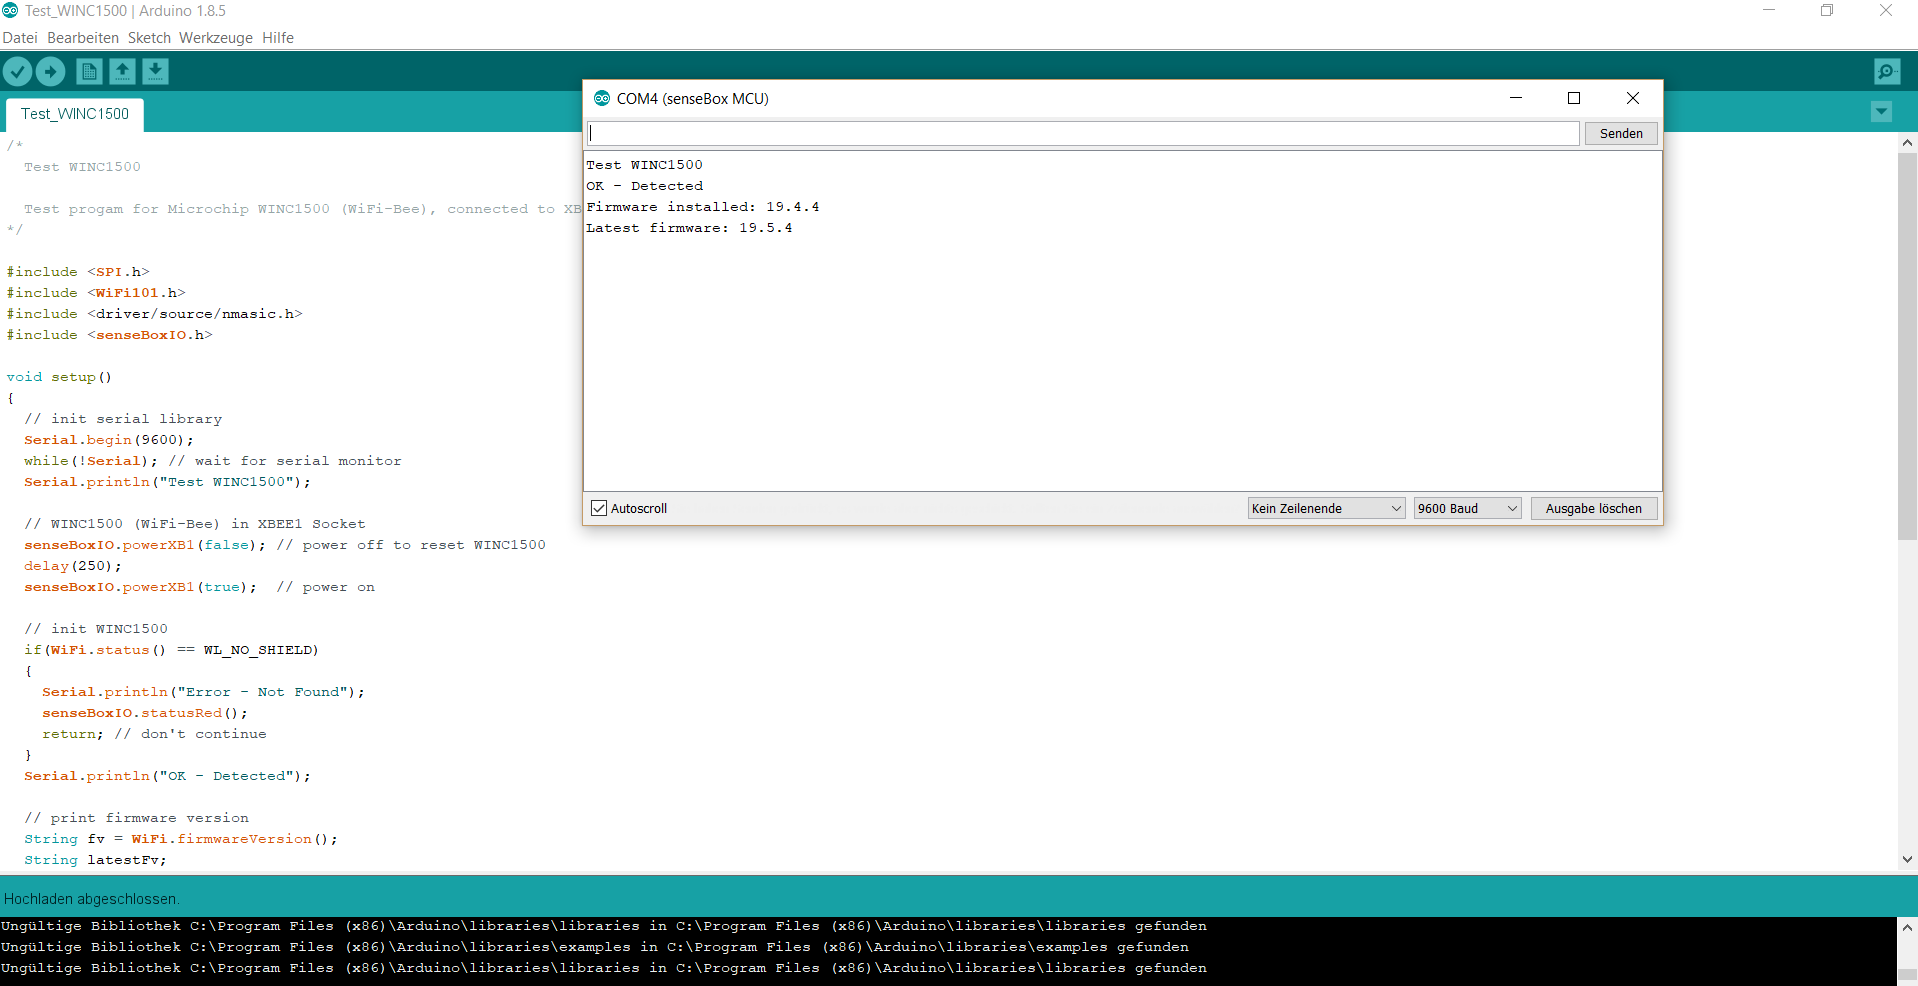
If you have a firmware 19.5.2, or higher >/b> you can cancel here. Your WiFi-Bee is working fine. If you have a firmware less than 19.5.2 you unfortunately have to update the firmware. You will learn how this works in the next step.
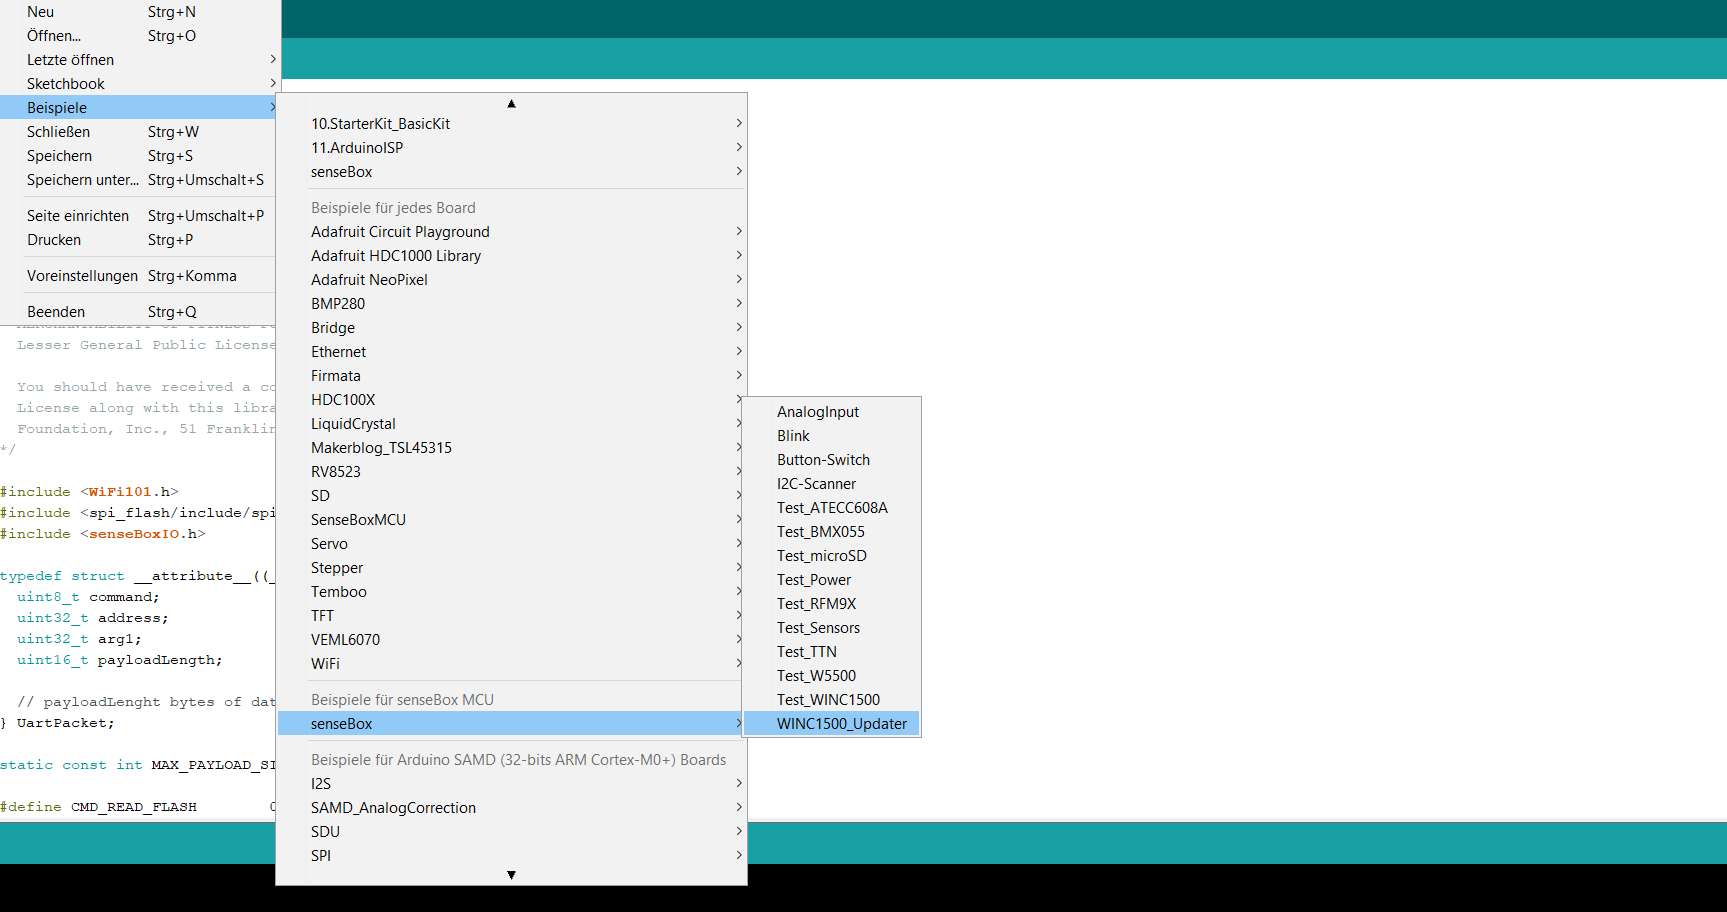
To update the firmware, follow the path from above: ‘File’ -> ‘Examples’ and under ‘Examples for senseBox MCU’ to ‘WINC1500_Updater’.
Now load the sketch onto your board (by clicking the arrow symbol), on which the WiFi-Bee is plugged in (please plug it into XBEE1).
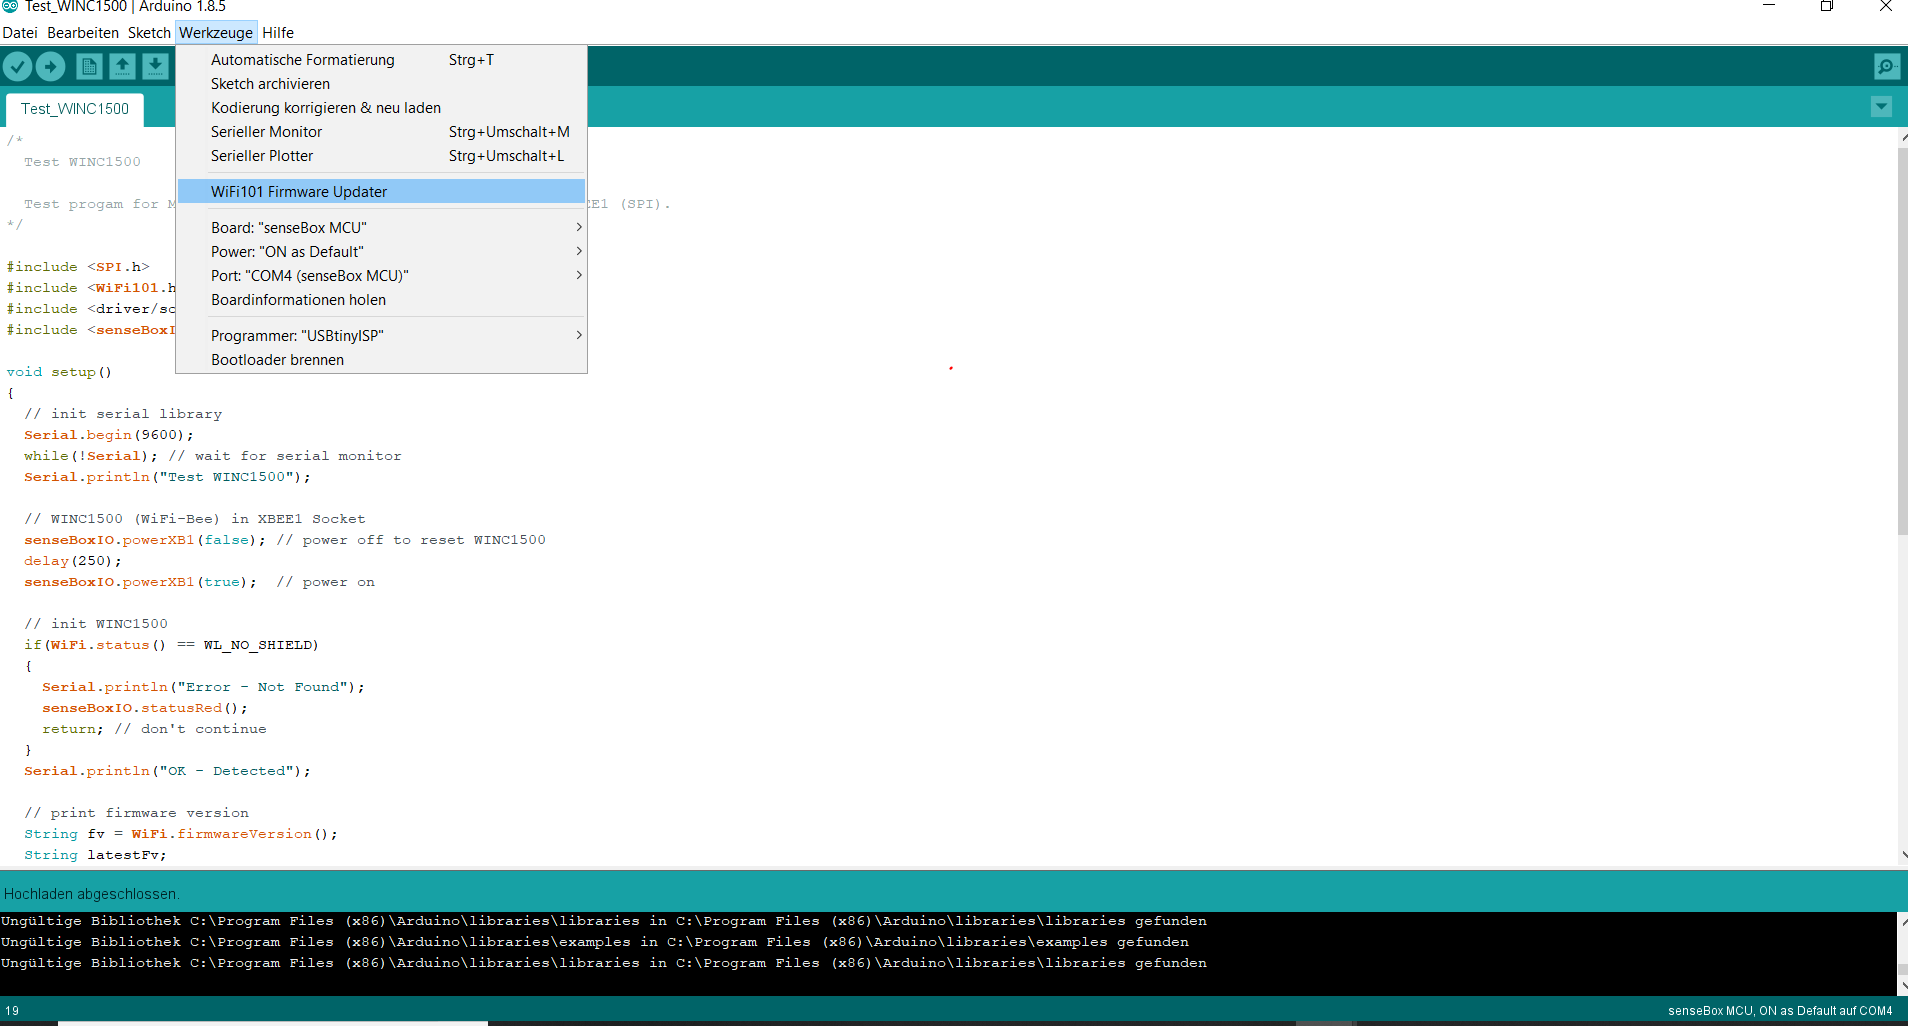
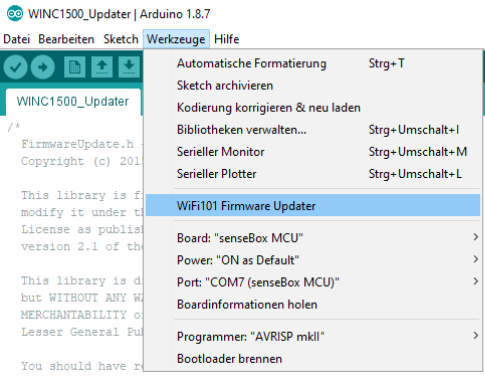
Then you have to click on ‘Tools’ and select ‘Wifi 101 Firmware Updater’.
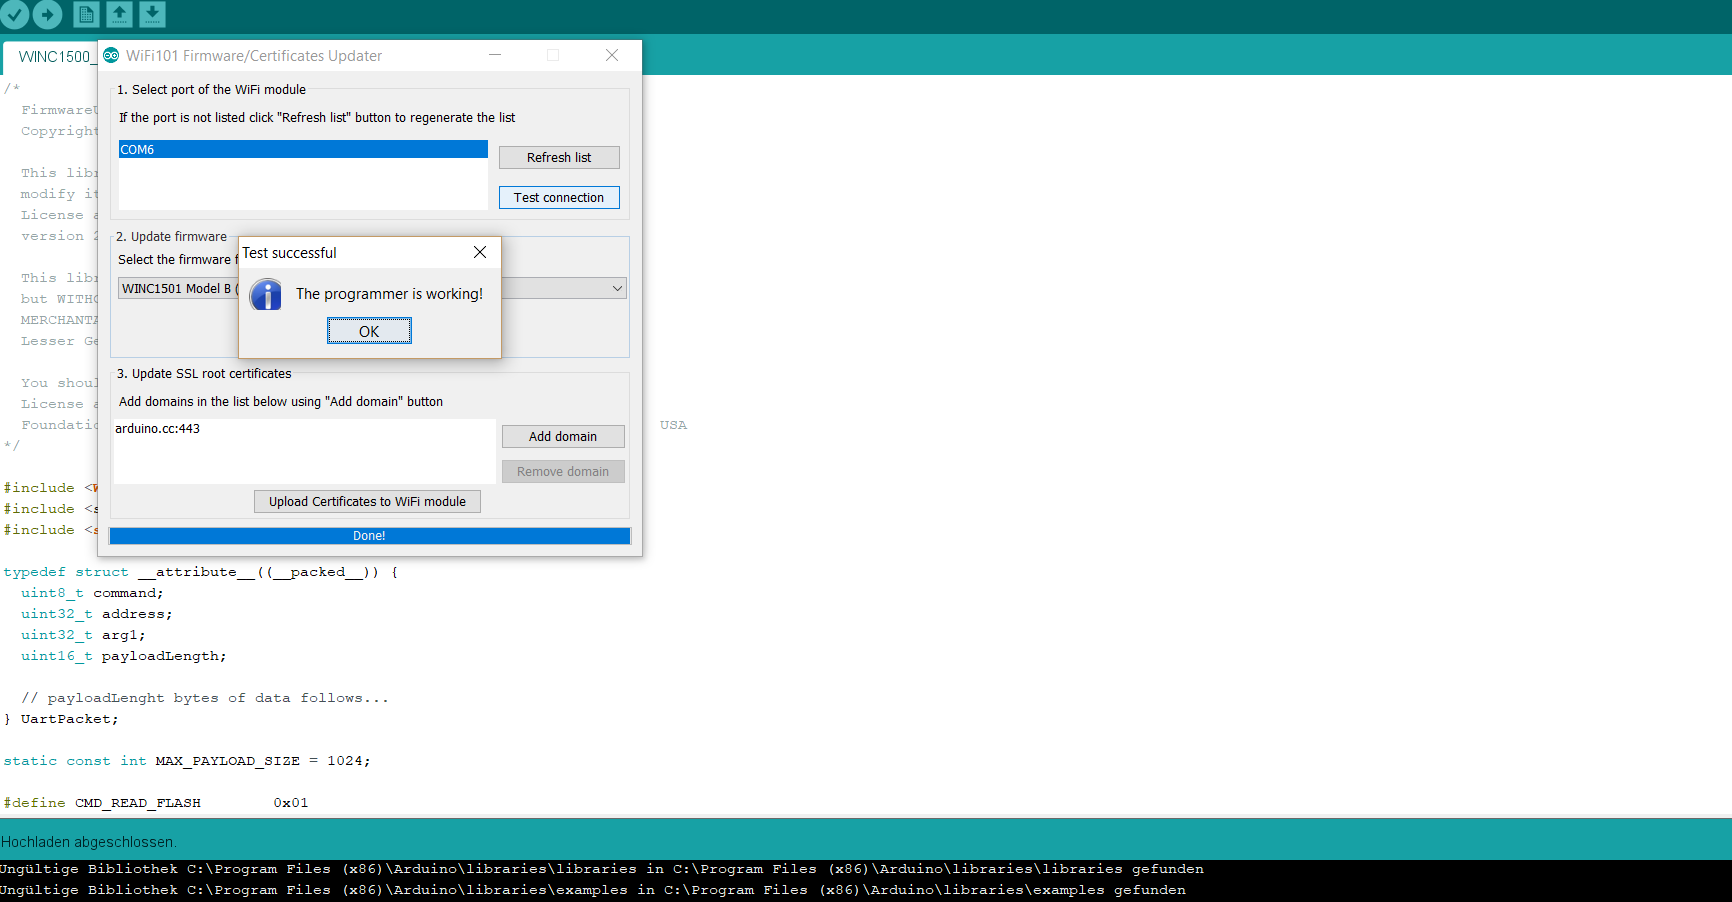
First you can test the connection by clicking on the displayed ‘COM Port’ and then on ‘Test connection’. It should return the following information: `“The programmer is working!
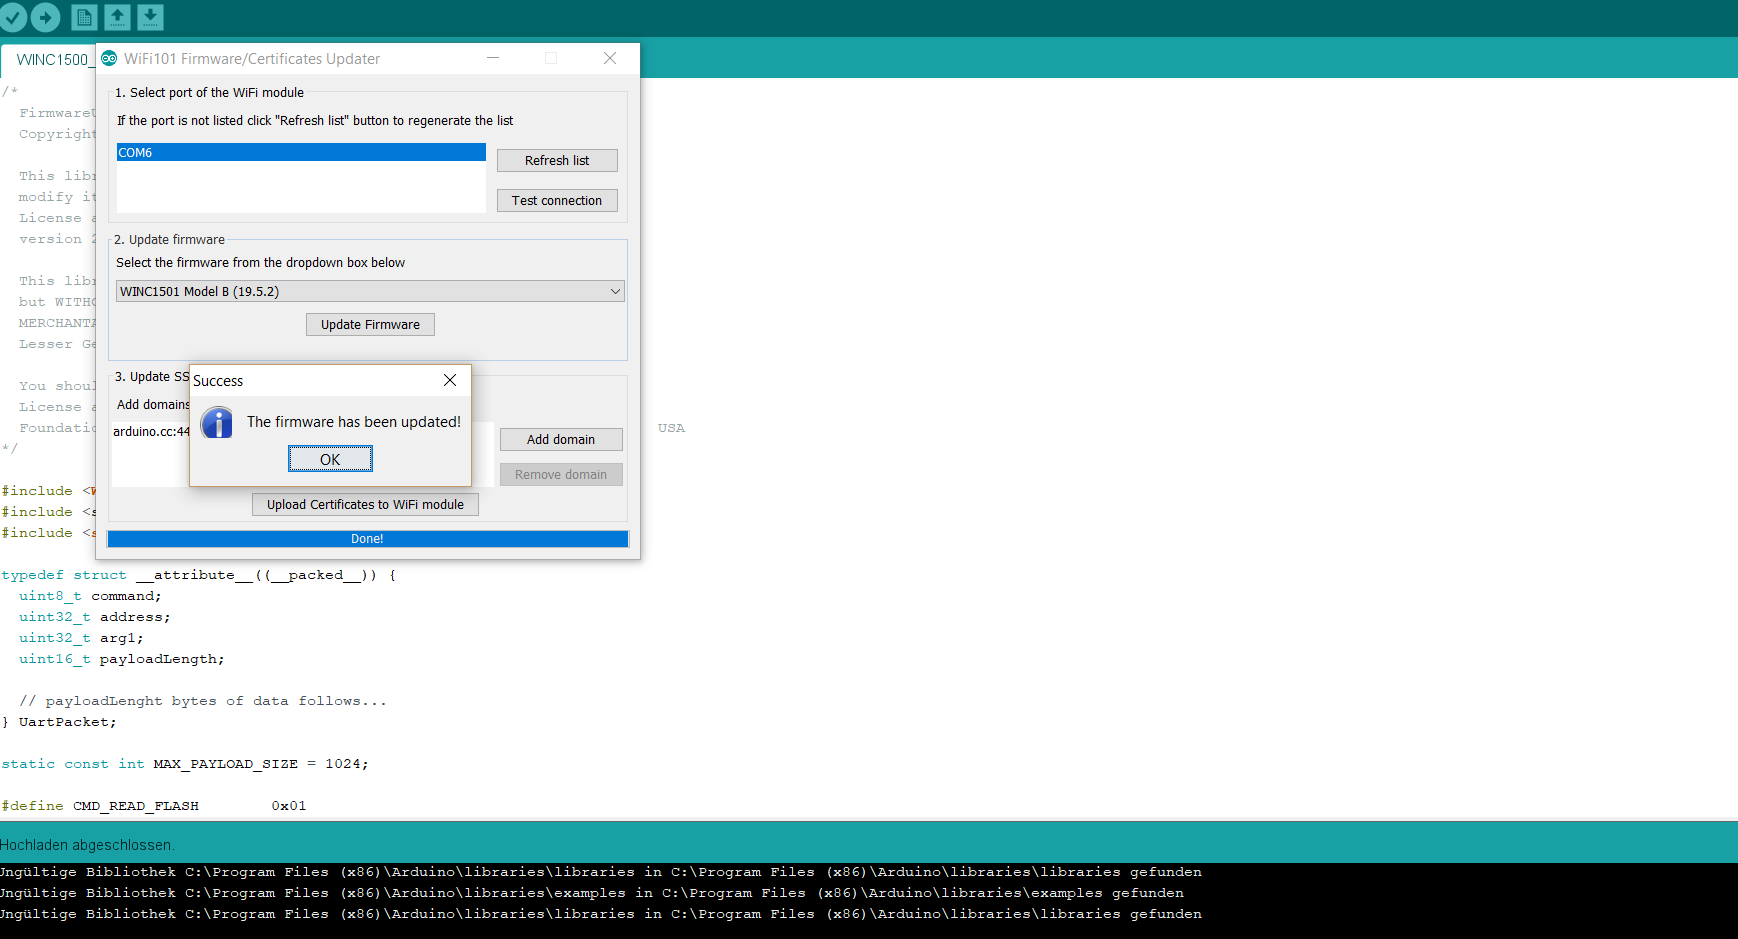
Almost done, now just click on ‘Update Firmware’ and the upload starts. After that a success message should appear `“The firmware has been updated!
For some time now, the senseBox and the openSenseMap have been using https to authenticate measured values. For this to work smoothly the WiFi module of the senseBox needs the corresponding SSL certificates. Usually these certificates are already present in your senseBox, this tutorial is only for senseBoxes where the transmission to the openSenseMap does not work!
Before you continue with this tutorial, make sure you have completed these two steps beforehand:
Download the WINC1500 updater from the examples - senseBox examples to the senseBox.
Wenn der Upload erfolgreich abgeschlossen wurde, kannst du nun den WiFi101 Firmware Updater aus den Werkzeugen starten:
In the menu that appears, select the port to which your senseBox is connected.
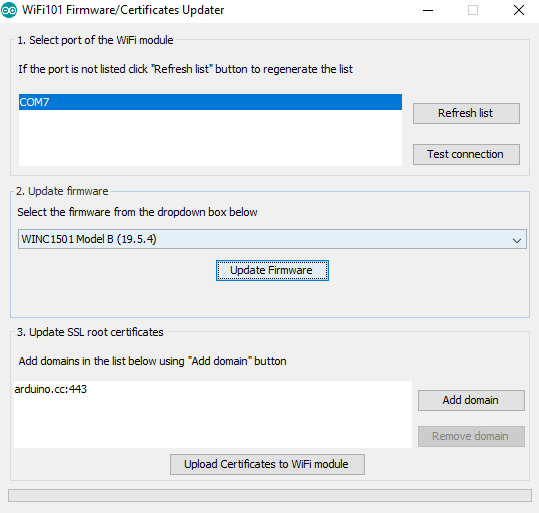
We can skip the 2nd point Update Firmware and go directly to the 3rd point Update SSL root certificates.
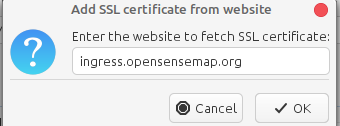
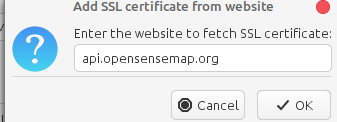
Now click Add domain and enter ingress.opensensemap.org and api.opensensemap.org.
The overview of the certificates should now look like this:

Now click on Upload Certificates to WiFi module and the certificates will be uploaded to the senseBox. Now you can transfer your original senseBox code again as the WiFi module of the senseBox is updated.
If you have problems with this step, remove the arduino.cc with the Remove domain button and try again.